Quality Assurance (QA)
The QA module is the regulatory heart of Nexus ERP: training providers and their accreditation, the qualification catalogue, learner records and enrolments, admissions, classes and QCTO accreditation all live here. Staff administer the registers; providers manage their own scope and learners; learners see their own journey.
Demo sign-ins: demo.staff, demo.provider, demo.learner — shared password Demo@2026
How it flows
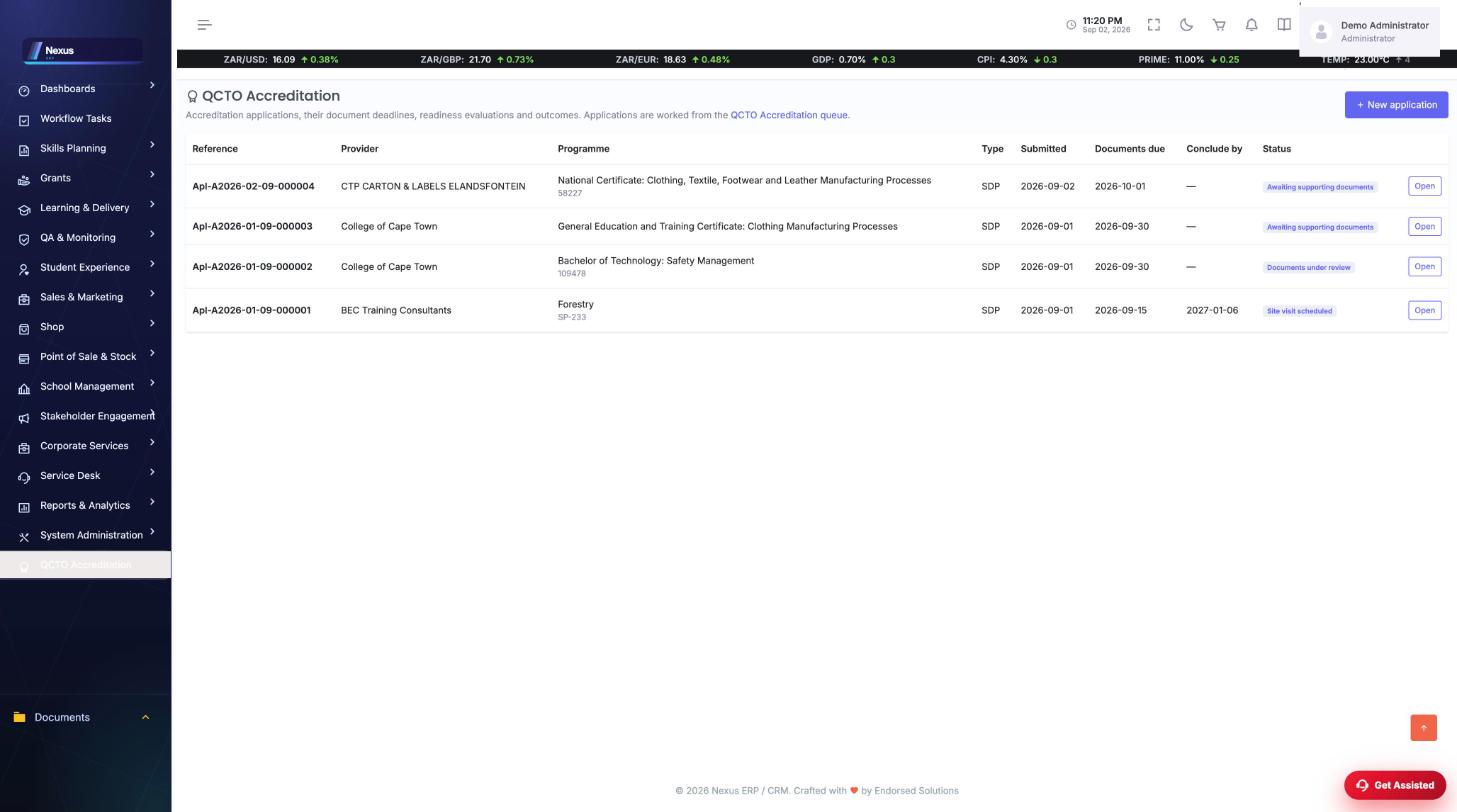
QCTO accreditation, end to end
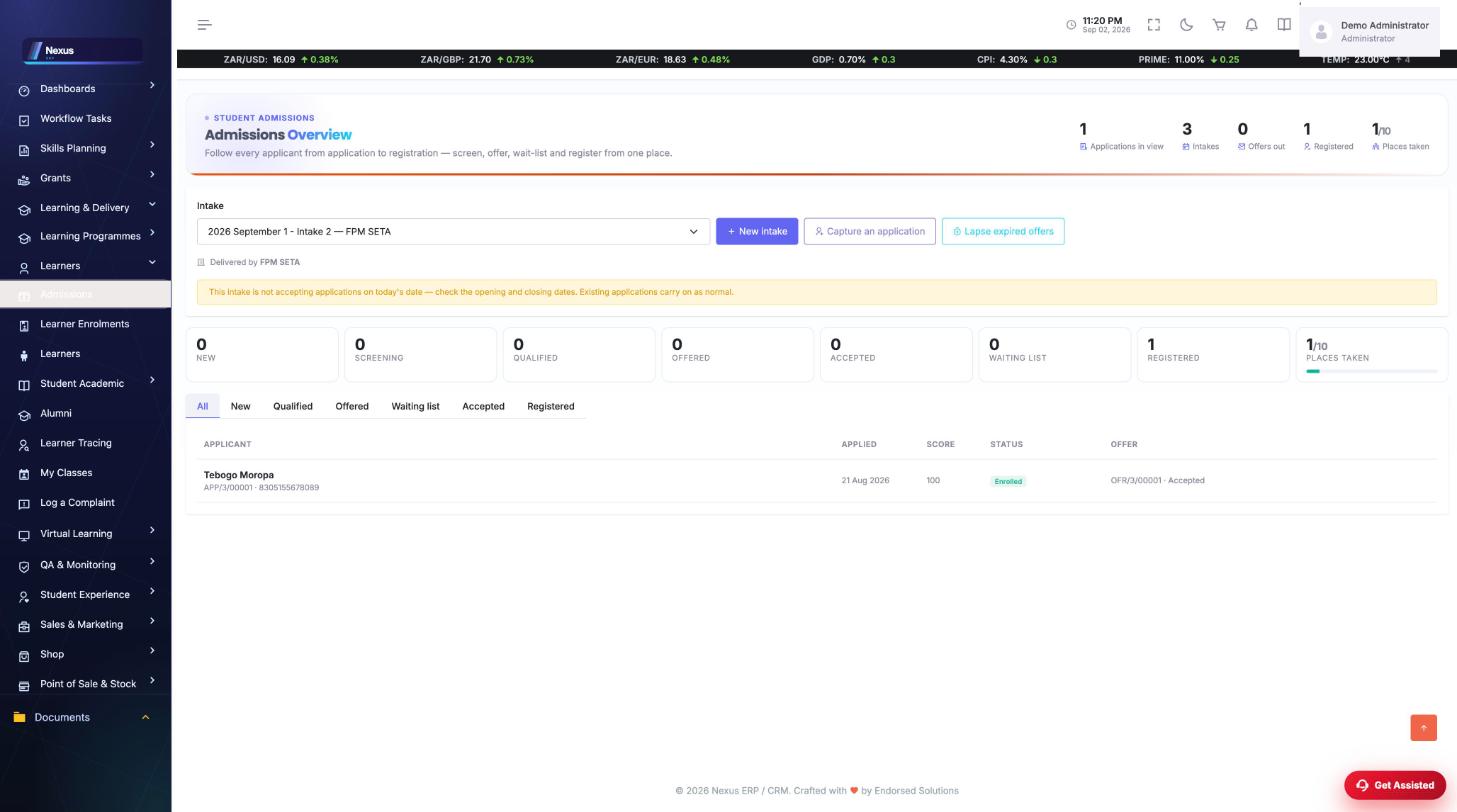
Admissions, application to registration
1. Admissions Process
One applicant, one pipeline. Each stage hands the applicant to the next until the registration becomes an enrolment on the register.
2. QCTO Accreditation Process
A training provider asks to be accredited; documents, readiness, a site visit and a decision follow — each step feeding the next.
Screen-by-screen
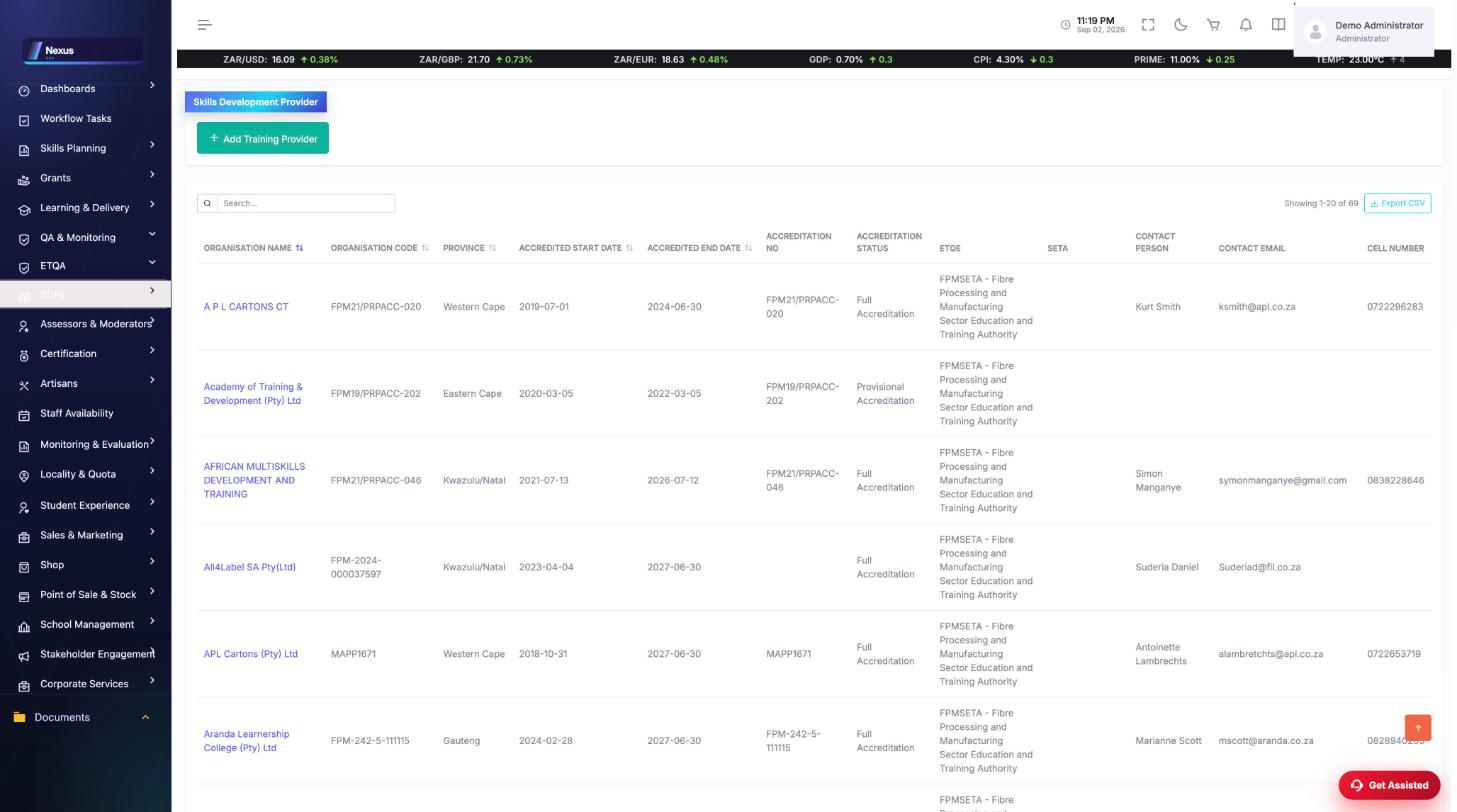
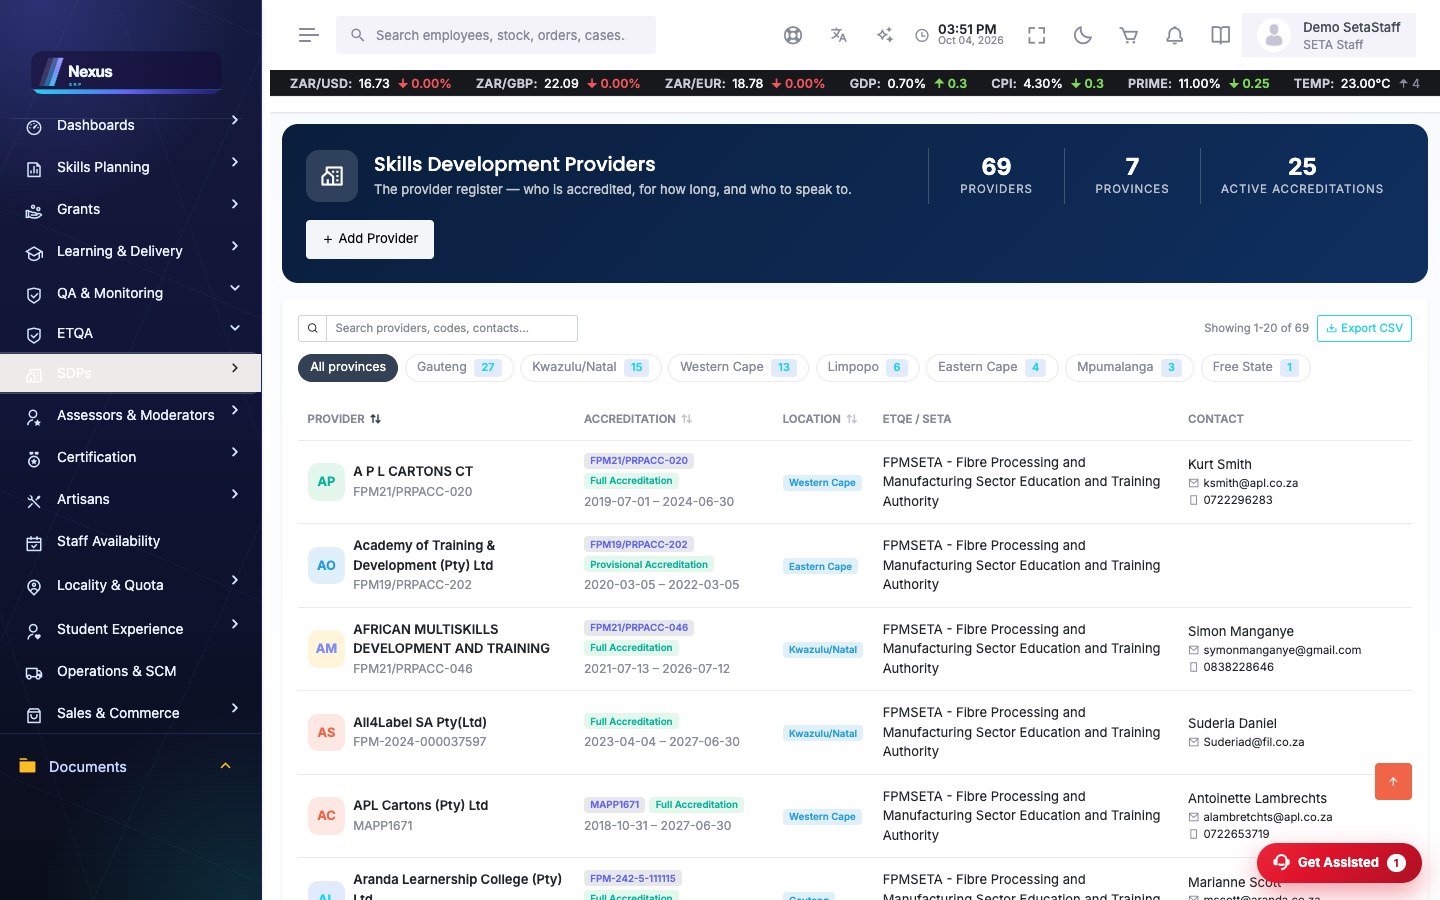
Training Provider Overview & Profile
/QA/TrainingProvider/TrainingProviderOverviewThe register of SDPs. Open a provider to reach its profile: Overview, Documents, Programme Scope, Branding (Brand Studio), Learners, Classes, Funded Projects and ETD Staff tabs.
- Search for the provider and open its profile.
- Programme Scope lists qualifications, skills programmes, unit standards and QCTO modules on the provider's scope.
- Click any qualification row to open the full qualification profile.
- Documents holds provider paperwork plus the read-only QCTO accreditation documents.
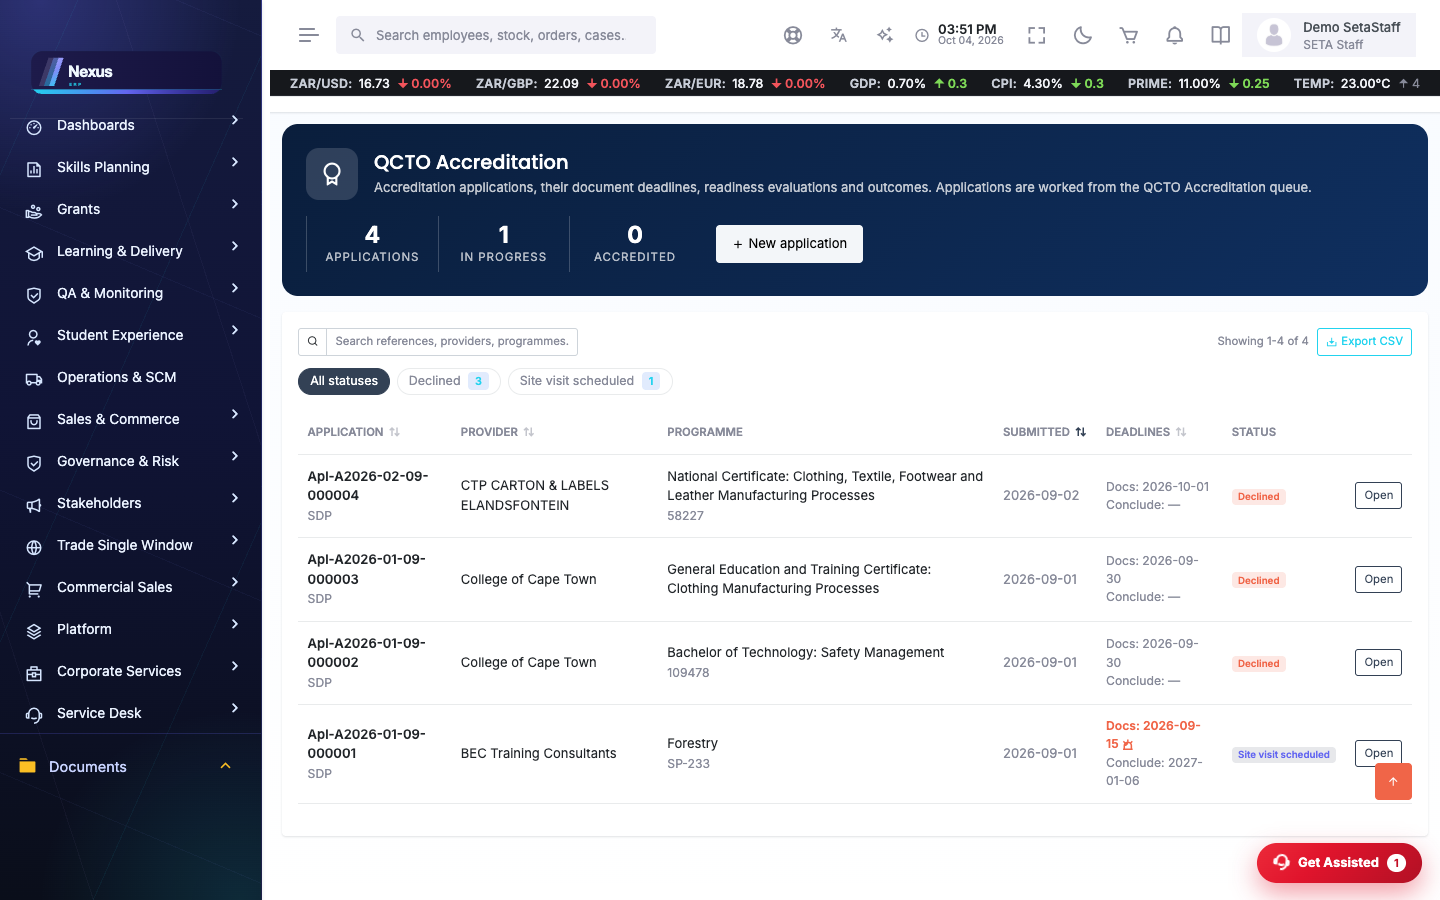
QCTO Accreditation
/QA/QCTOAccreditation/OverviewThe QCTO accreditation workspace: applications, document checklists, readiness evaluation and site visits.
- Open an application from the overview.
- Work through the document checklist — rows save automatically on change or key-up.
- The readiness bubble updates live as evaluation criteria are captured; amber means outstanding, green means done.
- Schedule the site visit once documents are complete; the provider confirms from their side and the scheduler is notified.
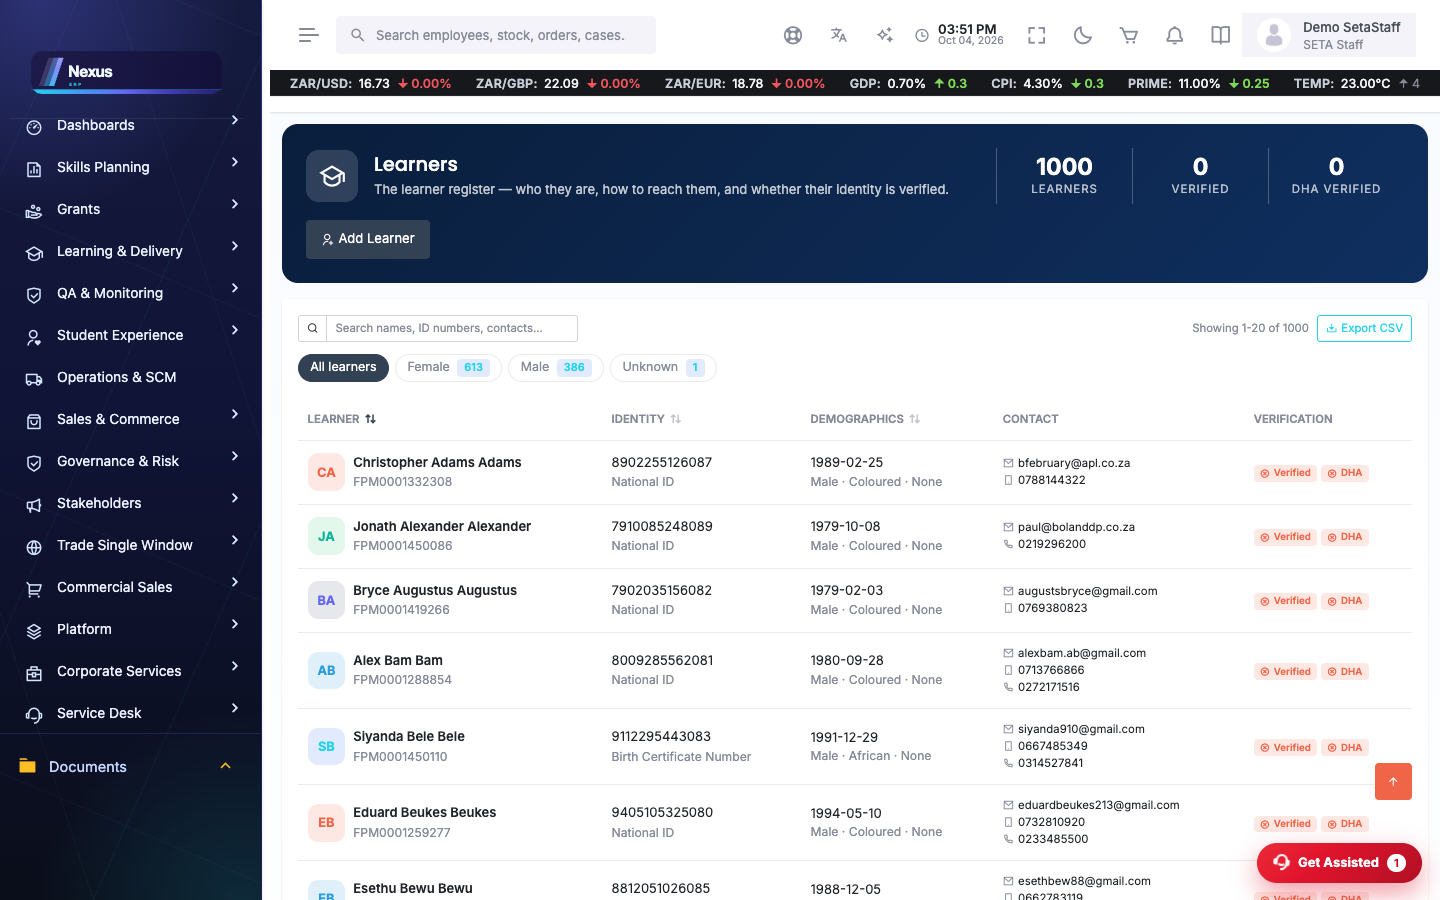
Learner Overview
/QA/Learner/LearnerOverviewEvery learner on the system, with profile, documents, funding and enrolment detail.
- Search by name or national ID and open the learner profile.
- Use Validate with DHA to verify identity against Home Affairs.
- Upload documents from the Documents tab — the type list is grouped by the stage of the learner journey each document is required at.
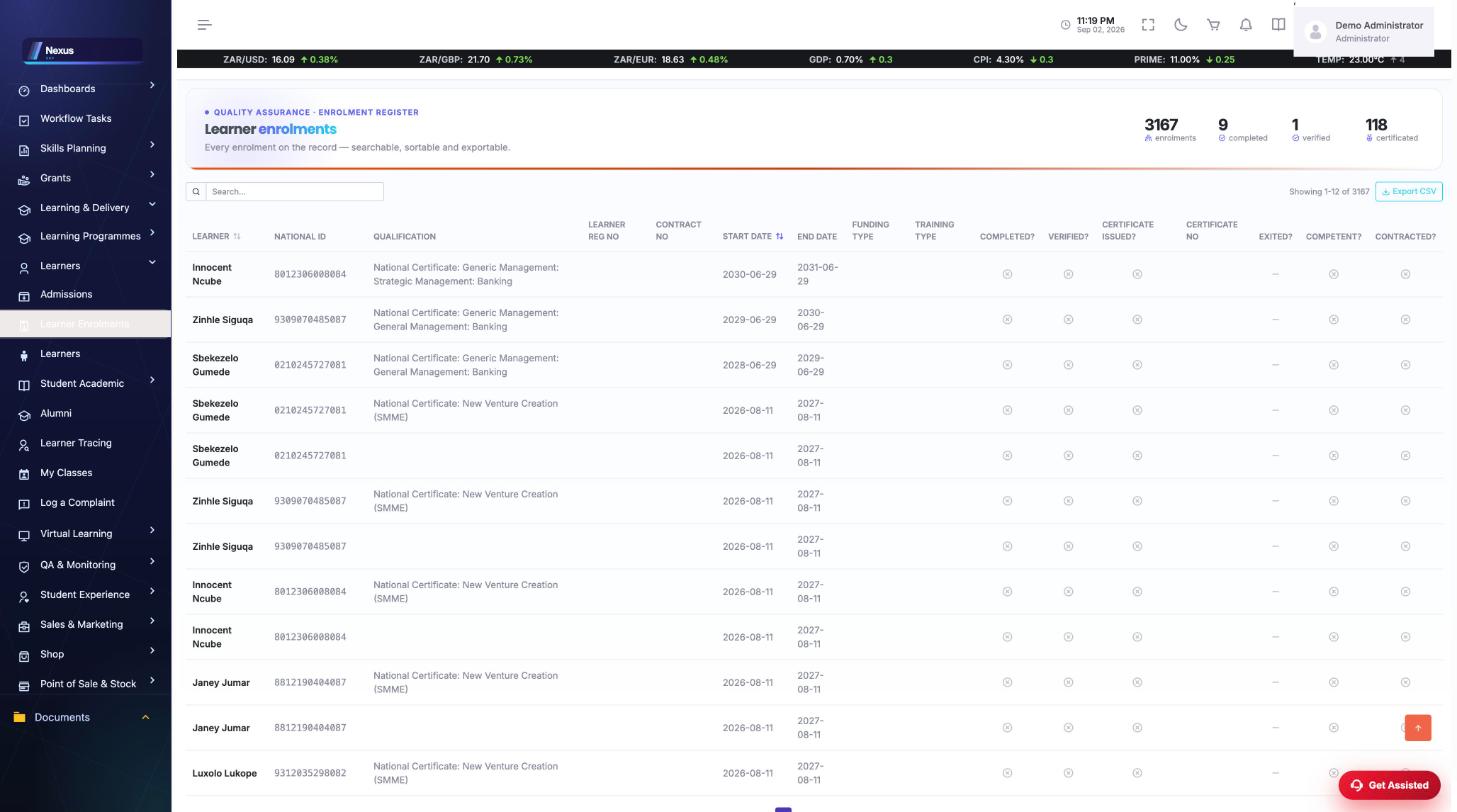
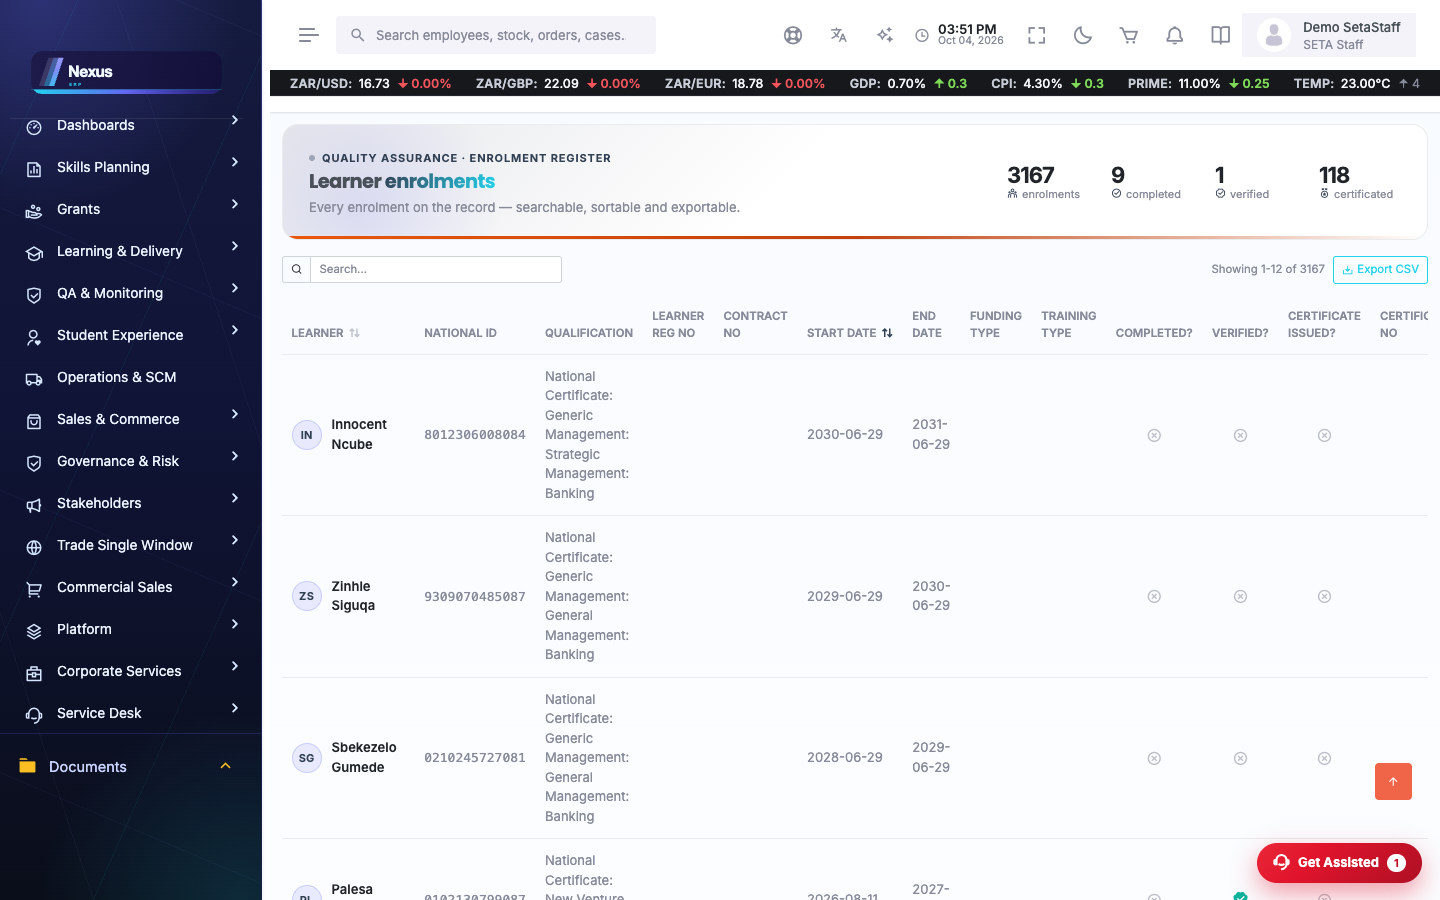
Learner Enrolment Overview
/QA/LearnerEnrolment/LearnerEnrolmentOverviewEnrolments across providers and programmes; staff see the full register with status icons, learners see their own.
- Filter or search the register.
- Open a class detail to check in learners or export attendance.
- Email the class attendance register straight from the class detail screen.
Admissions
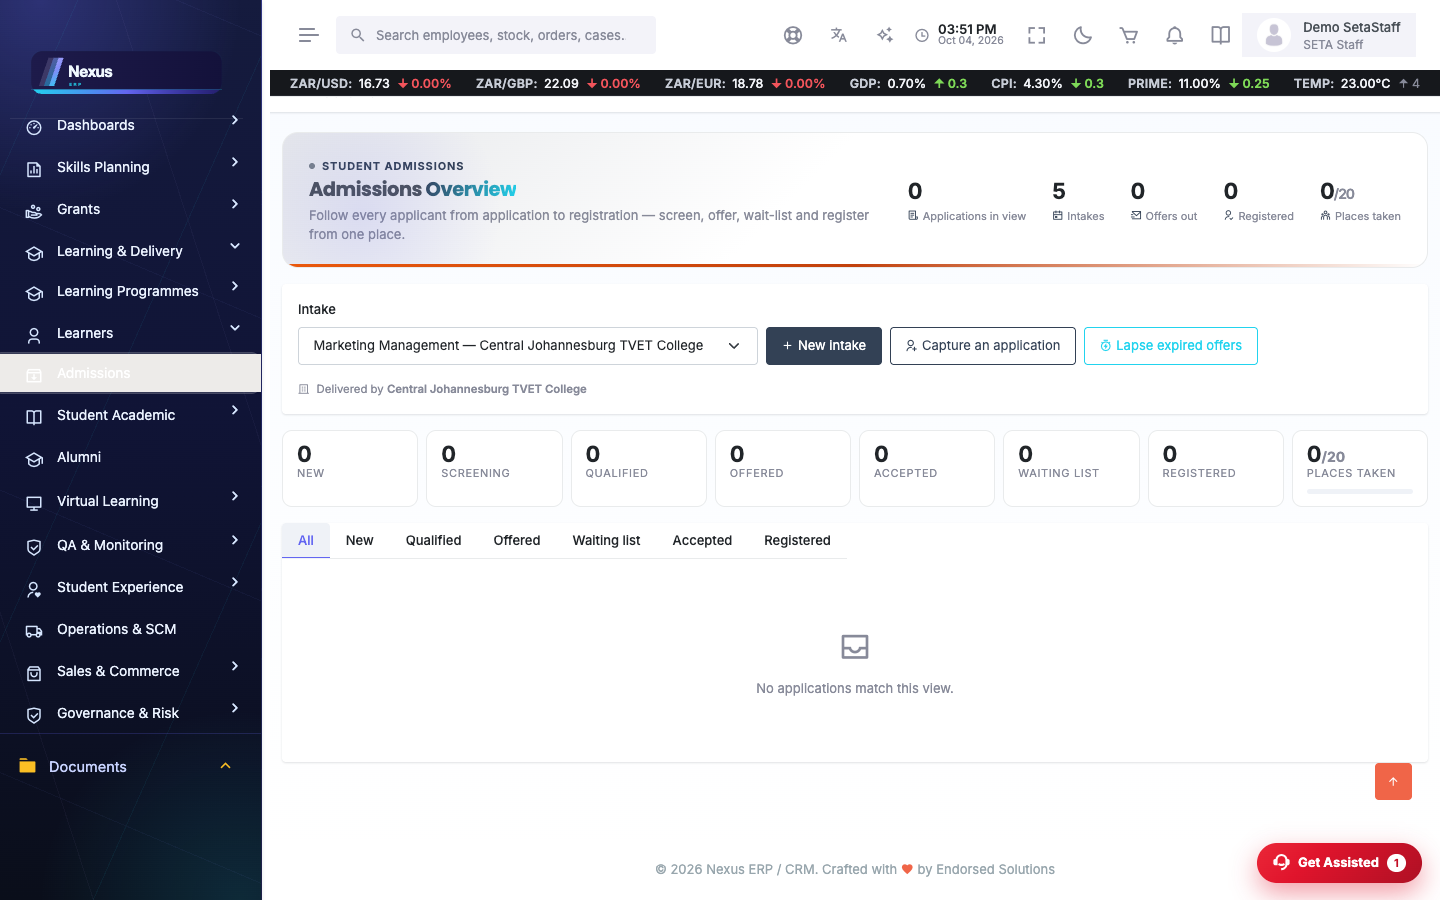
/QA/Admissions/AdmissionsOverviewIntakes, applications, offers and registrations in one pipeline.
- Create or pick an intake (capacity per intake is shown on the hero).
- Screen incoming applications, then Offer, Wait-list or Withdraw.
- When the applicant accepts, Register them — they become an enrolment.
Qualifications
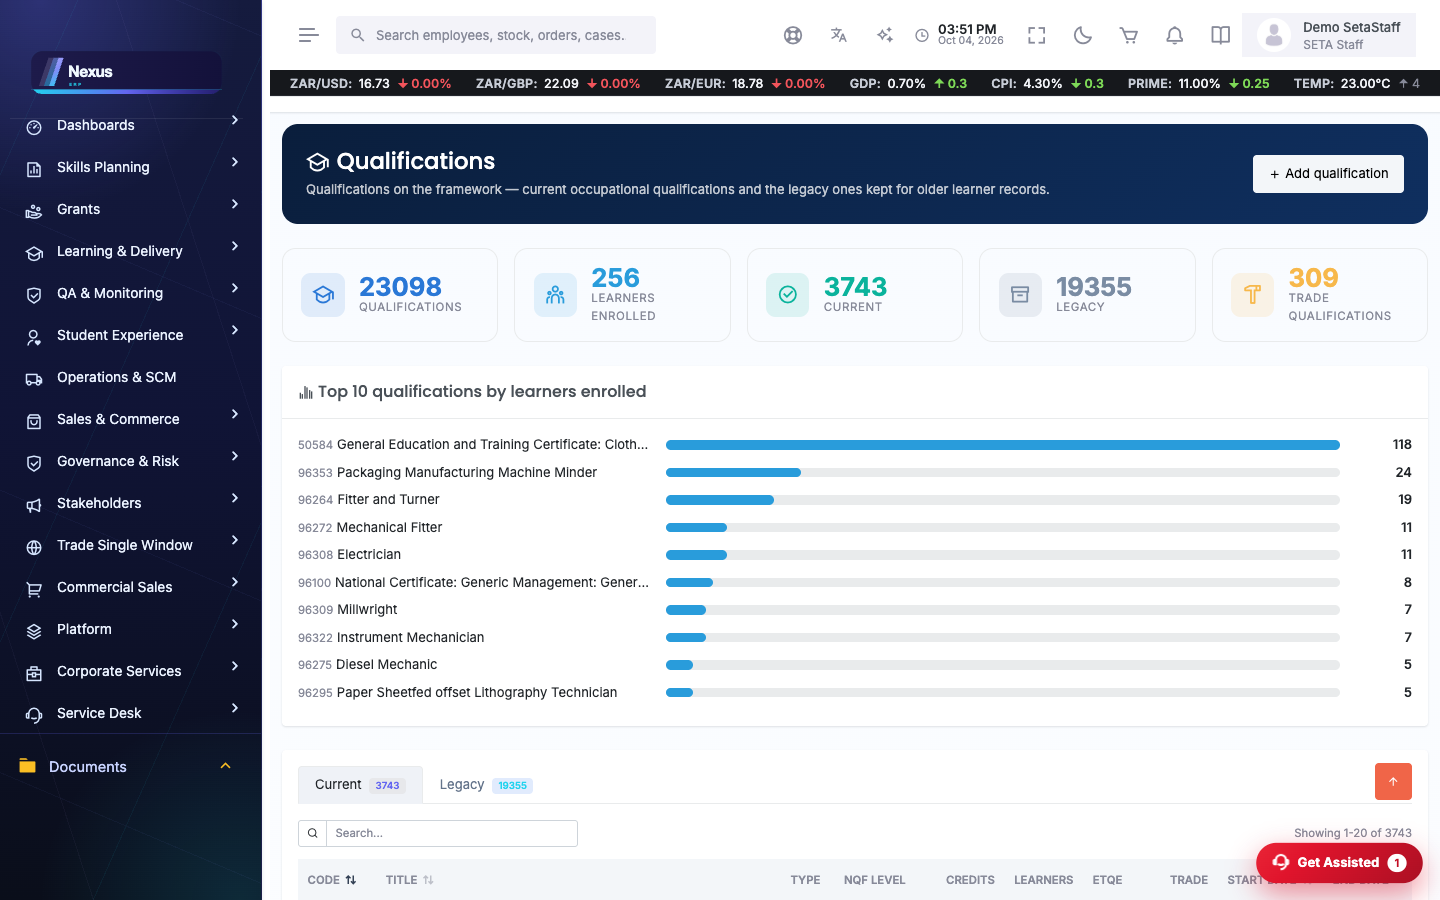
/QA/Qualification/QualificationsOverviewThe national qualification catalogue: profiles, linked unit standards or QCTO modules, and training material.
- Open a qualification profile for its details, linked learning units and training material.
- Staff and Administrators may edit, link modules and upload training material; other roles are view-only.
Classes
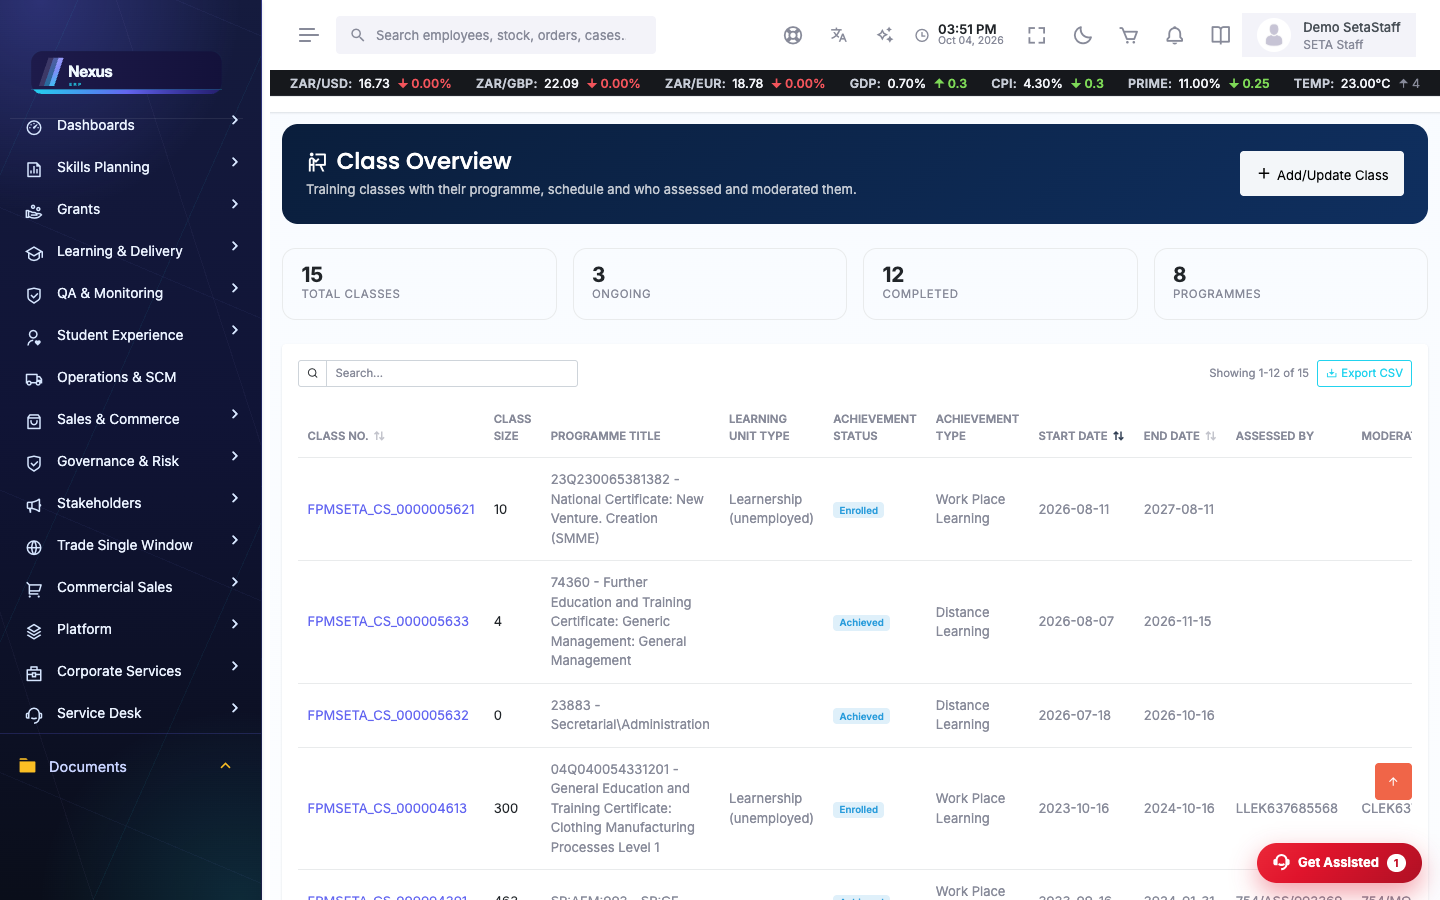
/QA/Class/ClassOverviewClass records with timetables, venue utilisation and clash checking.
- Open a class profile for its details, learners, schedule, attendance and facilitators.
- Generate a timetable and check clashes before publishing.
- Assign facilitators from the Facilitators tab — online sessions and QR attendance run from RAM.
FAQ & troubleshooting
Why can't I edit a qualification?
Qualification details are national catalogue data — only Staff and Administrators can change them. Everyone else gets the full read-only profile.
Where did the Submit for Verification button go?
It hides once the SDP is accredited or verified; there is nothing left to submit.
Why does the readiness bubble stay amber?
It counts evaluation criteria still unanswered. It flips green the moment every mandatory item is captured — no save button needed.